【Nginx基础】Nginx安装

1 通过命令方式安装

(1) 安装Nginx

yum -y install nginx

(2) 查看Nginx

nginx -v

返回结果类似如下所示,表示Nginx安装成功。
nginx version: nginx/1.20.1


2 通过源码方式安装

(1) 安装Nginx相关依赖

sudo yum install -y gcc-c++
sudo yum install -y pcre pcre-devel
sudo yum install -y zlib zlib-devel
sudo yum install -y openssl openssl-devel


(2) 下载Nginx

sudo wget http://nginx.org/download/nginx-1.8.1.tar.gz


(3) 解压Nginx

# 解压Nginx 1.8.1安装包,然后进入Nginx所在的文件夹
sudo tar zxvf nginx-1.8.1.tar.gz
cd nginx-1.8.1


(4) 配置Nginx

sudo ./configure \
--user=nobody \
--group=nobody \
--prefix=/usr/local/nginx \
--with-http_stub_status_module \
--with-http_gzip_static_module \
--with-http_realip_module \
--with-http_sub_module \
--with-http_ssl_module


(5) 编译安装

sudo make && make install


(6) 启动Nginx

cd /usr/local/nginx/sbin/
sudo ./nginx


(7) 安装结果

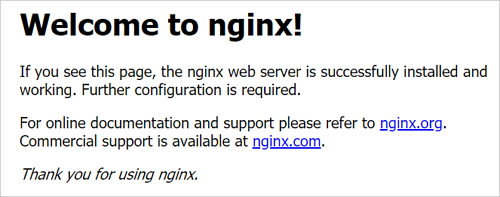
在本地主机中,使用浏览器访问ECS实例公网IP,出现如下图所示的页面,表示Nginx已成功安装并启动


相关推荐

  • 生成图片

    from PIL import Image, ImageColor, ImageDraw, ImageFont, ImageFilterdef create_image_with_text(size, color, text, font_path, font_size, text_color, shadow_color, output_path): """ Create a new image of specified size and color with centered text that has a border and shadow. :param size: A tuple con

  • 获取指定目录下的所有图片信息

    1 获取指定目录下的所有图片信息// 获取指定目录下的所有图片信息 public function getImagesInfo($directory) { $images = []; // 创建递归目录迭代器 $iterator = new \RecursiveIteratorIterator( new \RecursiveDirectoryIterator($directory, \RecursiveDirectoryIterator::SKIP_DOTS), \RecursiveIteratorIterator::LEAVES_ONLY ); // 遍历目录中的每个文件 foreach (

  • Thinkphp各版本的PHP要求

    ThinkPHP 8.0:运行环境要求PHP8.0+,兼容PHP8.3ThinkPHP 6.1:运行环境要求PHP7.2+,兼容PHP8.1ThinkPHP 6.0:运行环境要求PHP7.2+,兼容PHP8.1ThinkPHP 5.1:运行环境要求PHP5.6+,兼容PHP8.0ThinkPHP 5.0:运行环境要求PHP5.4+,兼容PHP7.3