1.关闭防火墙
# 1.查看当前防火墙的状态:若防火墙的状态参数是inactive,则防火墙为关闭状态;若防火墙的状态参数是active,则防火墙为开启状态。
systemctl status firewalld

# 2.关闭防火墙:若防火墙已经关闭,则不用执行。
systemctl stop firewalld
systemctl disable firewalld
2.关闭SELinux
# 1.查看SELinux的当前状态:如果SELinux状态参数是Disabled,则SELinux为关闭状态。如果SELinux状态参数是Enforcing,则SELinux为开启状态。
getenforce

# 2.关闭SELinux:打开config文件,然后找到SELINUX=enforcing,按i进入编辑模式,将参数修改为SELINUX=disabled,然后保存退出即可。
vim /etc/selinux/config

# 3.重启ECS实例
shutdown -r now

# 4.再次查看状态
getenforce
3.拉取镜像
docker pull mysql
docker pull php:7.4-fpm
docker pull nginx
4.创建容器
# 1.启动MySQL容器:
docker run -id --name=c_mysql --restart always -p 3306:3306 \
-v /docker/mysql/conf:/etc/mysql/conf.d \
-v /docker/mysql/logs:/logs \
-v /docker/mysql/data:/var/lib/mysql \
-e MYSQL_ROOT_PASSWORD=123456 \
mysql:latest

# 2.启动PHP容器:
docker run -id --name=c_php --restart always -p 9000:9000 \
-v /docker/nginx/html:/var/www/html \
--link c_mysql \
php:7.4-fpm

# 3.创建Nginx主配置文件:由于创建容器时,不能直接挂载文件,若要挂载文件,宿主机必须要先创建该文件,然后再在创建容器时,挂载该文件(主配置文件的内容就是nginx服务器的主配置文件内容,不用做任何修改,直接拷贝nginx服务器的主配置文件过来即可);在创建nginx容器之前,可以先创建一个nginx测试容器,然后将测试容器中的/etc/nginx/nginx.conf配置文件拷贝出来,然后删除nginx测试容器,再在宿主机的自定义nginx.conf文件中,粘贴即可,详情操作如下:(下面两个方案二选一即可,推荐使用第一种)

方案1:
# 1)创建文件存放目录:mkdir -p /docker/nginx/conf
# 2)创建nginx测试容器:docker run -id --name=test_nginx nginx:latest
# 3)拷贝主配置文件:docker cp test_nginx:/etc/nginx/nginx.conf /docker/nginx/conf/nginx.conf
# 4)停止nginx测试容器:docker stop test_nginx
# 5)删除nginx测试容器:docker rm test_nginx

方案2:
# 1)创建文件存放目录:mkdir /docker/nginx/conf
# 2)切换文件存放目录:cd /docker/nginx/conf
# 3)新建文件:vim nginx.conf
# 4)粘贴如下的nginx主配置文件内容(该配置内容其实就是从测试容器的主配置文件中拷贝出来的)

# 文件内容开始了
user  nginx;
worker_processes  auto;

error_log  /var/log/nginx/error.log notice;
pid        /var/run/nginx.pid;

events {
    worker_connections  1024;
}

http {
    include       /etc/nginx/mime.types;
    default_type  application/octet-stream;

    log_format  main  '$remote_addr - $remote_user [$time_local] "$request" '
                      '$status $body_bytes_sent "$http_referer" '
                      '"$http_user_agent" "$http_x_forwarded_for"';

    access_log  /var/log/nginx/access.log  main;

    sendfile        on;
    #tcp_nopush     on;

    keepalive_timeout  65;

    #gzip  on;

    include /etc/nginx/conf.d/*.conf;
}
# 文件内容结束了


# 4.启动Nginx容器:443为https协议端口,【--link c_php:php111】可以省略后面的php111,若省略,则在配置站点时,在处理php页面的fastcgi_pass处,使用php容器的IP地址来指明php位置;若不省略,则在配置站点时,在处理php页面的fastcgi_pass处,则可以直接使用php111指明php位置:

docker run -id --name=c_nginx --restart always \
-p 80:80 -p 443:443 \
-v /docker/nginx/conf/nginx.conf:/etc/nginx/nginx.conf \
-v /docker/nginx/conf.d:/etc/nginx/conf.d \
-v /docker/nginx/html:/usr/share/nginx/html \
-v /docker/nginx/logs:/var/log/nginx \
--link c_php:php \
nginx:latest
5.部署测试
1)步骤1:创建站点配置文件
命令1:cd /docker/nginx/conf.d
命令2:vim default.conf

配置文件内容:
server {
    listen       80;
    listen  [::]:80;
    server_name  localhost;

    #access_log  /var/log/nginx/host.access.log  main;

    location / {
        root   /usr/share/nginx/html;
        index  index.php index.html index.htm;
    }

    #error_page  404              /404.html;

    # redirect server error pages to the static page /50x.html
    #
    error_page   500 502 503 504  /50x.html;
    location = /50x.html {
        root   /usr/share/nginx/html;
    }

    # proxy the PHP scripts to Apache listening on 127.0.0.1:80
    #
    #location ~ \.php$ {
    #    proxy_pass   http://127.0.0.1;
    #}

    # pass the PHP scripts to FastCGI server listening on 127.0.0.1:9000
    # php:9000中的php就是创建nginx容器时,【--link c_php:php】项中的php,这里也可写PHP容器的IP地址;
    # /var/www/html处的注意事项:
    # 1) 当php文件在/var/www/html/目录下时(一个文件),则直接写/var/www/html/
    # 2) 当php文件在/var/www/html/blog目录下时(一个项目),则需要写/var/www/html/blog/

    location ~ \.php$ {
        fastcgi_pass   php:9000;
        fastcgi_index  index.php;
        fastcgi_param  SCRIPT_FILENAME  /var/www/html/$fastcgi_script_name;
        include        fastcgi_params;
    }

    # deny access to .htaccess files, if Apache's document root
    # concurs with nginx's one
    #
    #location ~ /\.ht {
    #    deny  all;
    #}
}
2)步骤2:重启Nginx容器
命令1:docker exec -it c_nginx /bin/bash
命令2:nginx -t
命令3:nginx -s reload
命令4:exit
3)步骤3:创建PHP文件
命令1:cd /docker/nginx/html
命令2:vim index.php
# index.php文件内容如下
<?php
phpinfo();
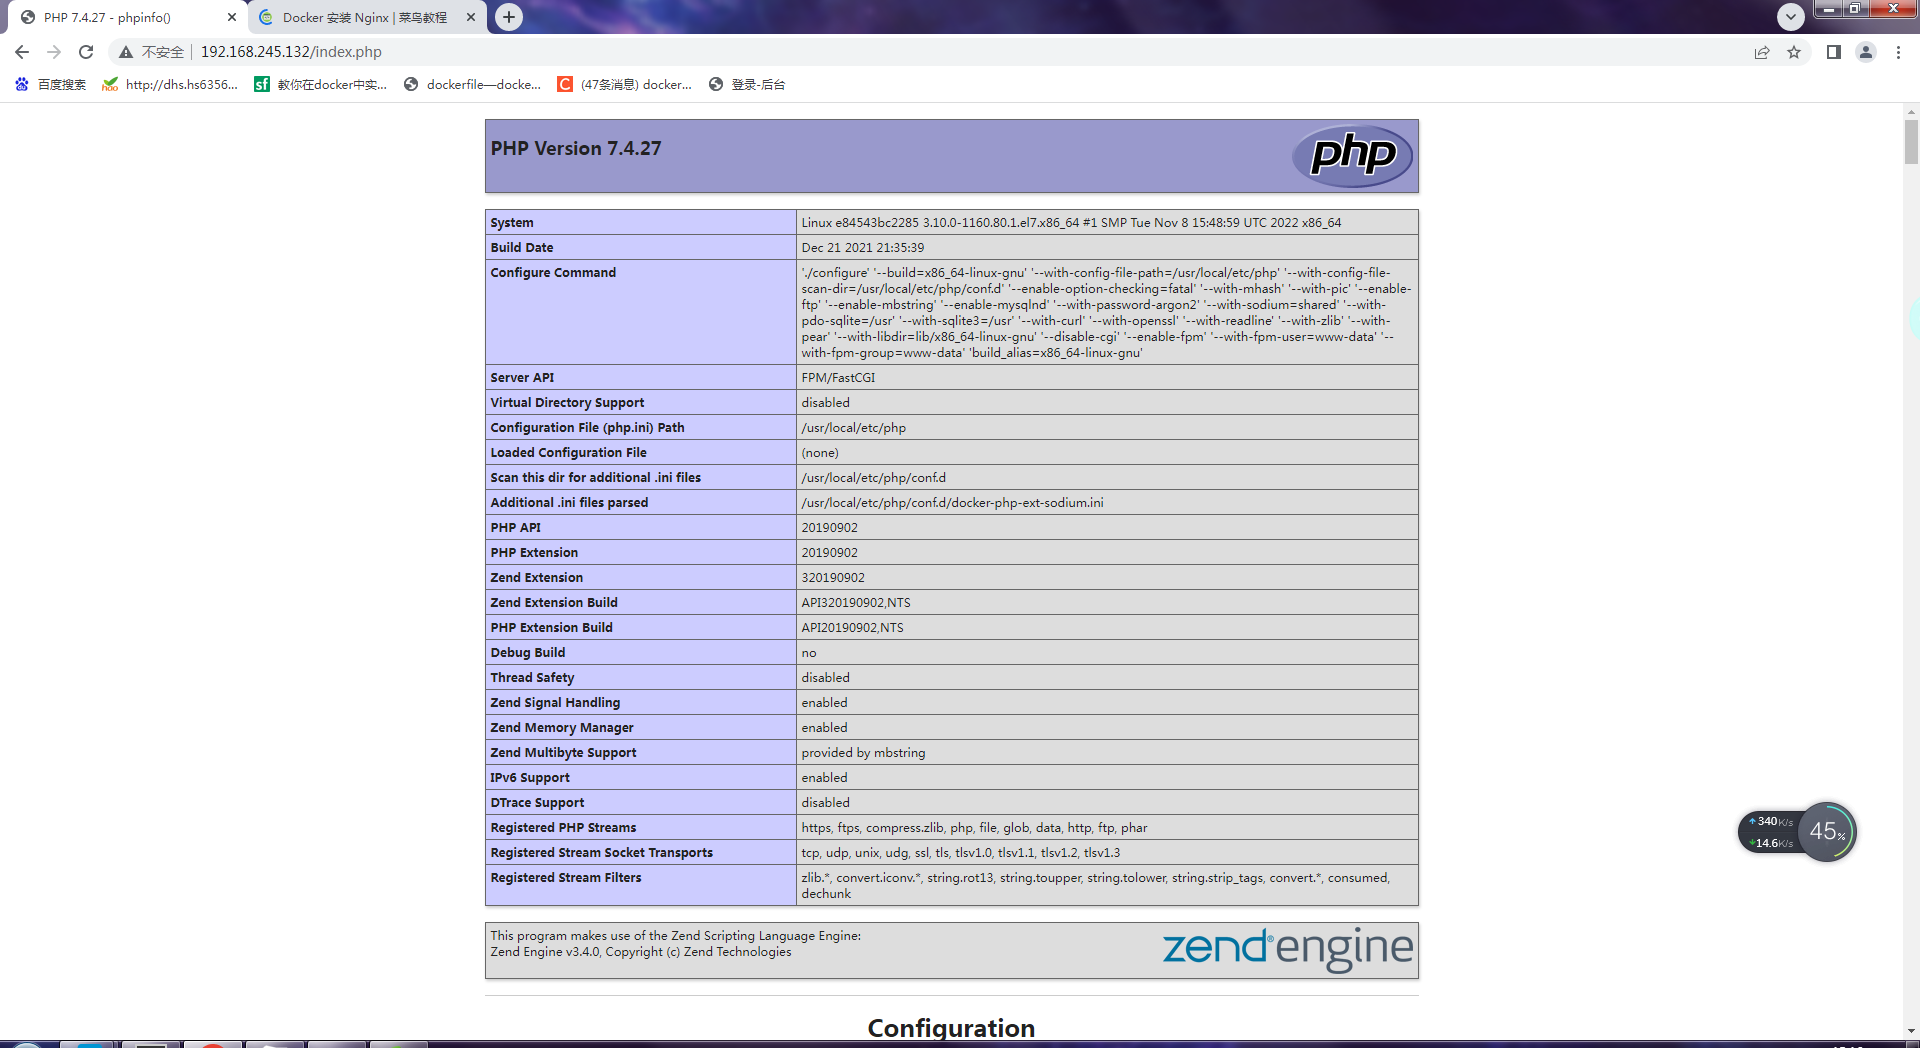
?>4)步骤4:浏览器访问php文件,网址:http://192.168.245.132/index.php