1 多域名配置简介
多域名配置就是一个项目,配置有多个域名,每个域名,对应一个模块。
2 多域名配置过程
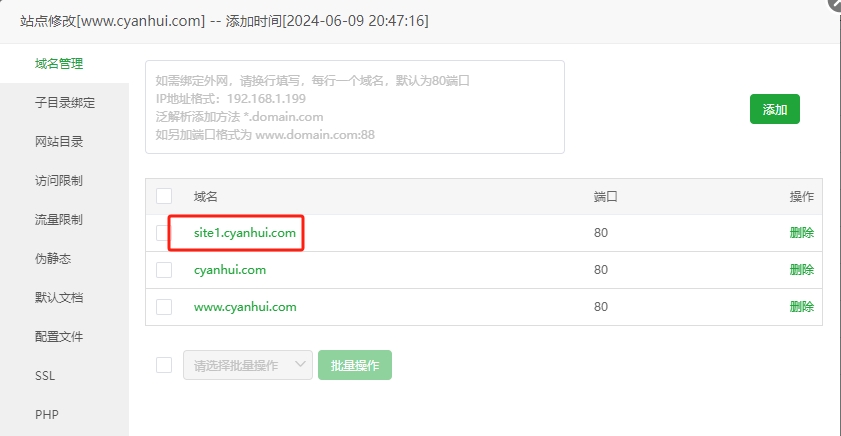
1)首先,把域名解析到指定的服务器IP,然后在宝塔里面的指定项目,添加域名,如下:
2)接着,在项目的public/index.php入口文件添加如下的配置:
// 多域名配置
switch ($_SERVER['HTTP_HOST'])
{
    case 'www.cyanhui.com':
        $model = 'home';        // home模块
        break;
    case 'cyanhui.com':
        $model = 'home';        // home模块
        break;
    case 'site1.cyanhui.com':
        $model = 'site1';       // site1模块
        break;
}
define('BIND_MODULE',$model);
3)接着,修改config/app.php文件中default_module值,如下:
// 默认模块名
// 'default_module'         => 'home',
'default_module'         => BIND_MODULE,
// 禁止访问模块
'deny_module_list'       => ['common'],
// 默认控制器名
'default_controller'     => 'Index',
// 默认操作名
'default_action'         => 'index',
4)接着,修改route/route.php文件的内容,如下:
<?php
use think\facade\Route;

// 域名1
Route::domain(['www.cyanhui.com', 'cyanhui.com'], function () {
    // 首页
    Route::get('/', 'home/Index/index');
});

// 域名2
Route::domain('site1.cyanhui.com', function () {
    // 站点2首页
    Route::rule('/', 'site1/Index/index');
    // 站点2列表
    Route::rule('/cate:category_id', 'site1/Article/index');
    // 站点2详情
    Route::rule('/info:id', 'site1/Article/detail');
});
5)接着,访问www.cyanhui.com域名,结果如下:

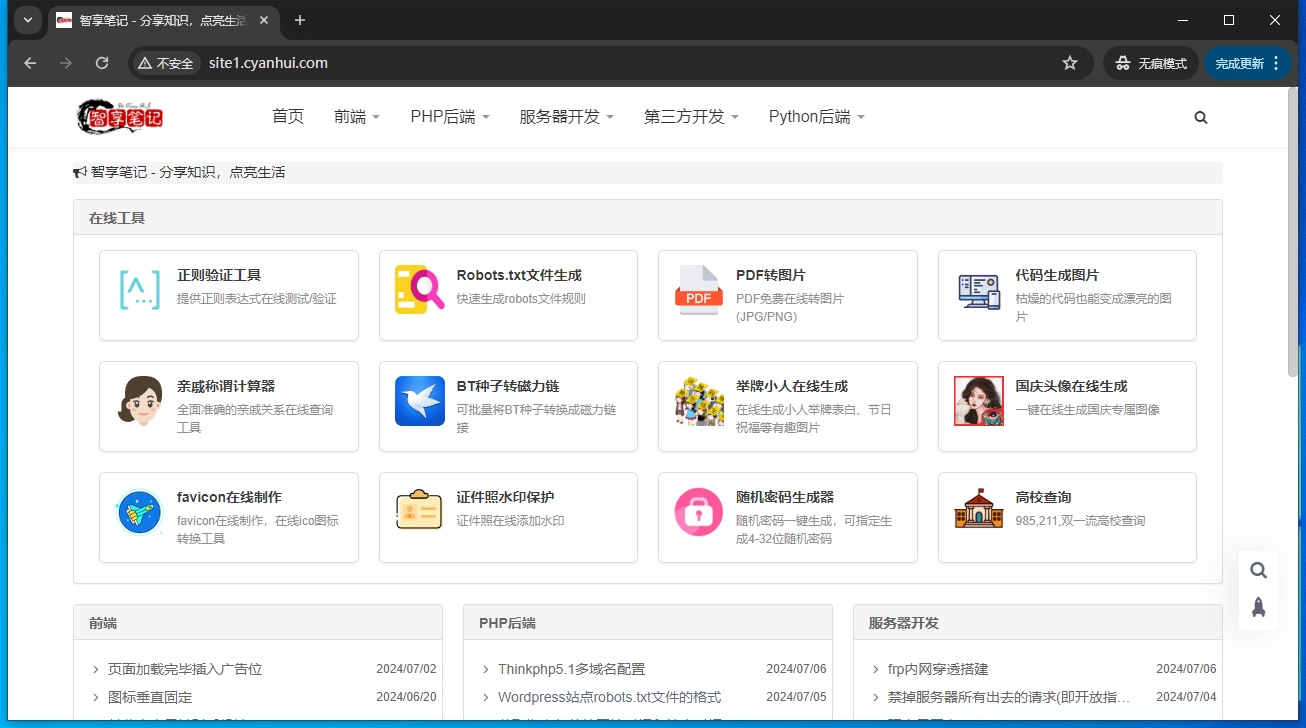
6)接着,访问site1.cyanhui.com域名,结果如下:
7)到处,多域名配置完成。